With Zapier, you can link more than 1,000 other apps to your Trainual account. Learn how to make a Zap here.
❗️To make a Trainual Zap, you must first log in to an existing Zapier account or Sign Up for a new Zapier account.
To configure a Zap:
-
Select the "Make a Zap!" button
-
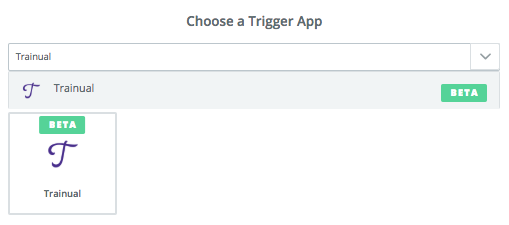
Choose "Trainual" from the drop-down menu
-
Select your Trainual Trigger. To see a full list of options, choose "show less common options" at the bottom of the screen.
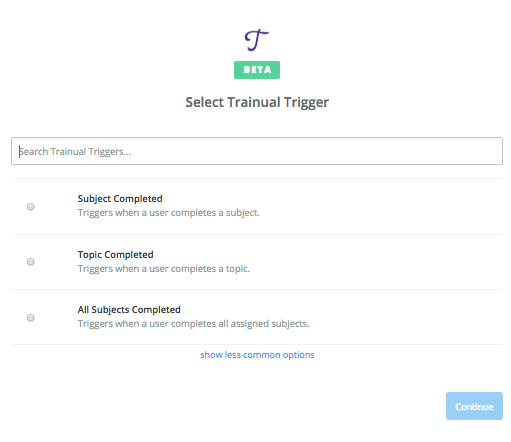
🔥 Tip: We've created a few Zap templates to make it easier for you!
-
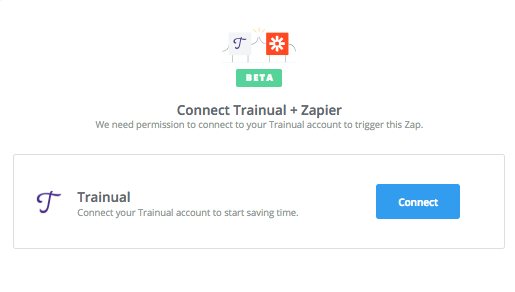
Connect your account by clicking the “Connect” button.
-
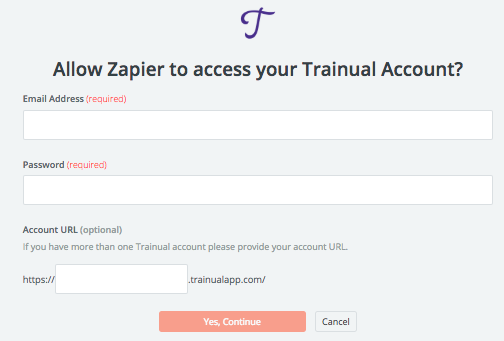
A window will pop up asking you to log into your Trainual account. Enter your email and password used to log into your Trainual account > enter your Trainual account's subdomain > click "Yes, Continue"
-
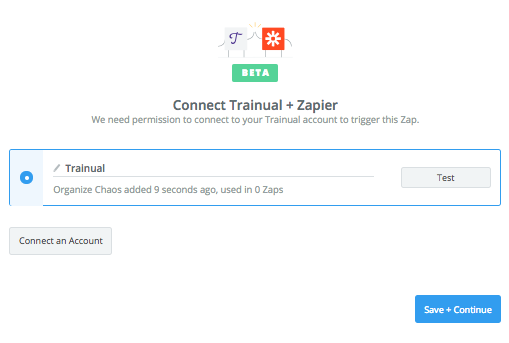
Once you connect your account, you'll see your Zap listed as shown below:
-
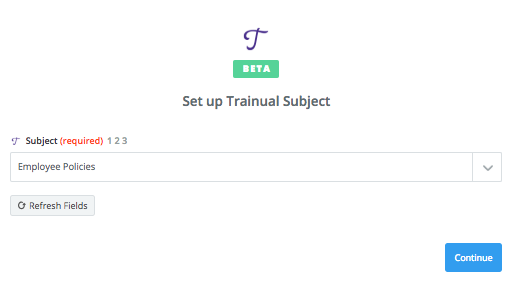
Test your Zap connection. If it works, you'll be prompted to select an item from the drop-down. In this case, our trigger is "Subject Completed," so we need to choose a Subject from our Trainual account.
-
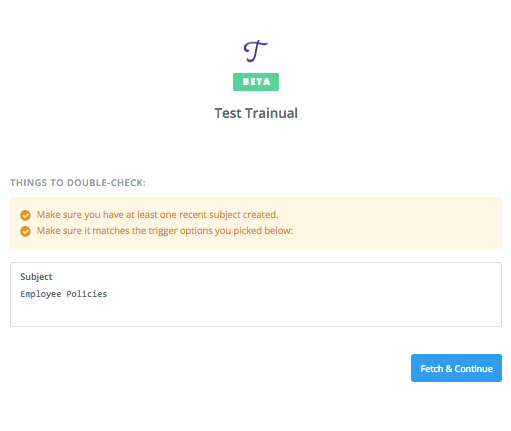
Zapier will then attempt to test that the endpoint works. Click "Fetch & Continue"
-
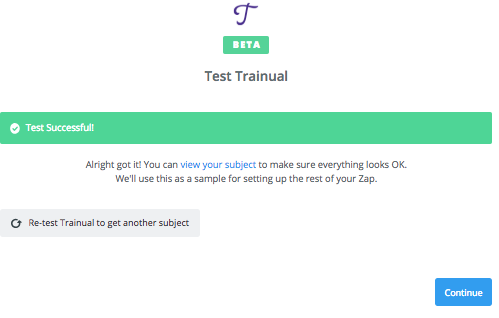
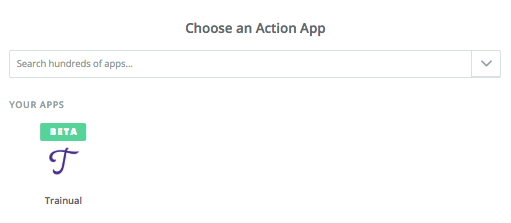
If the test works, you'll get a confirmation showing that it was successful. Click "Continue" to proceed to choose your Action App (the app you wish to connect Trainual with to create a Zap)
-
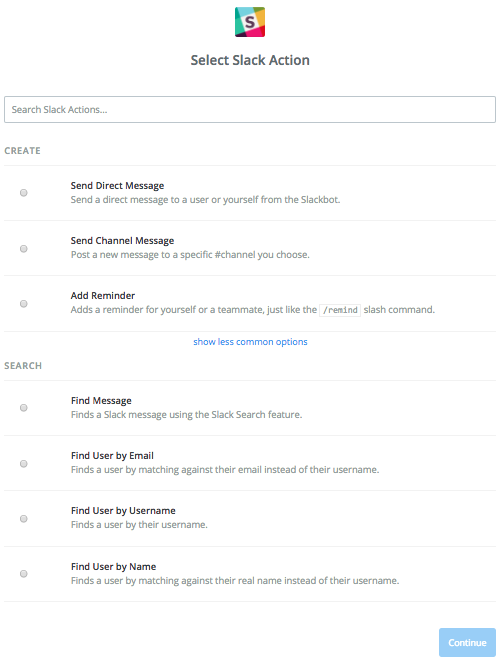
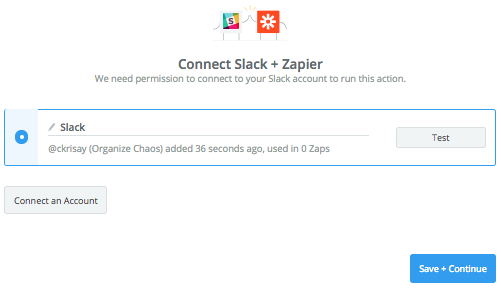
In this example, we are going to connect Trainual with Slack.
-
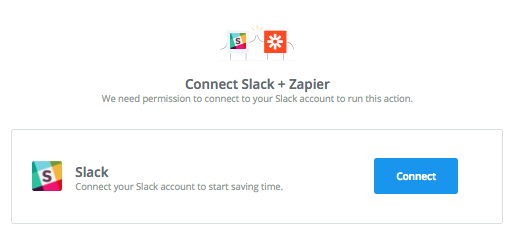
We are going to select "Send Direct Message" so that when a user completes a Subject, their manager will be notified via Slack. The next step is connecting your Slack account to Zapier, just as we did with Trainual earlier.
-
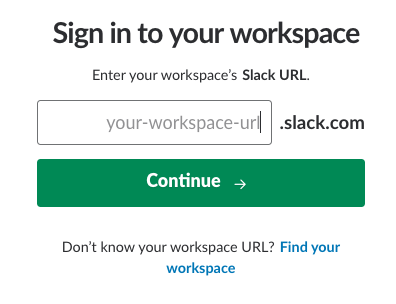
Click "Connect" and then a pop-up to sign in to your workspace on Slack will appear.
-
Type in your workspace's URL. You'll be prompted to enter your email address and password. It will ask you to Authorize access to your account. Click the green "Authorize" button to proceed.
-
Follow the same steps as before to test the account and then click "Save + Continue"
-
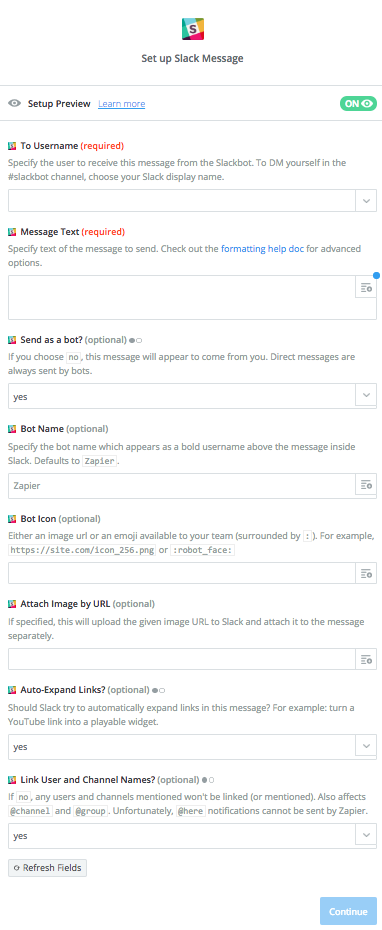
From here, you will need to set up how you'd like the Slack Message to look when it sends. In this case, only the first two fields are required. Choose a username from the drop-down and enter the message text (what will appear when the Zap fires). Click "Continue"
-
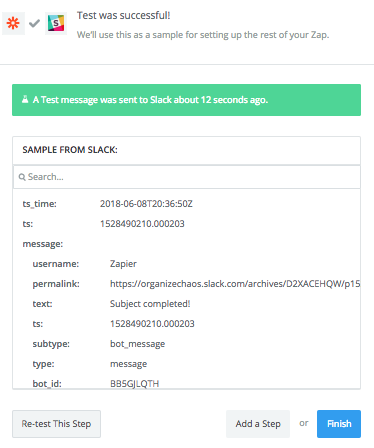
Zapier will then prompt you to send a test to Slack.

-
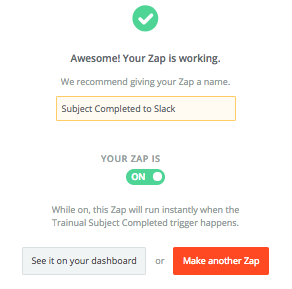
If the test goes through on Slack, click "Finish." The next screen will ask you to name your Zap and turn it on.

-
Enter a name and toggle off to on. Your Zap is now ready!