When you're scaling your team, it can be pretty tedious to add everyone one by one. With bulk adding, you can invite your whole team all at once with a CSV upload. 🔥

📝 Please note: You can also bulk invite trainees through an integration if you have access to an HRIS! 👀
To bulk add your team:
-
Expand the "Account" tab from the left-hand navigation bar and then click "Manage users."
-
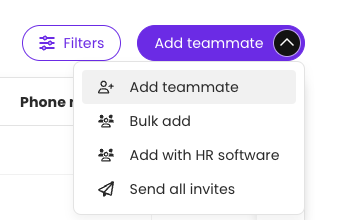
Click on the drop-down arrow on the "Add teammate" button on the top right-hand corner of the page
-
Select "Bulk add."
-
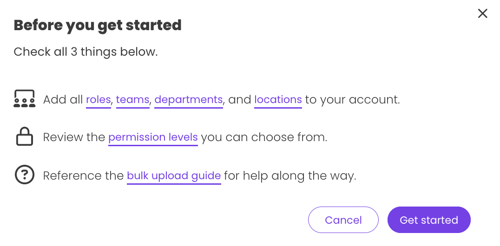
You'll see a pop-up, like the one pictured below, that guides you through best practices before doing your bulk inviting. ✅ Make sure to use the bulk upload guide for support along the way! 🤩
-
-
Hit the "Get started" button when you're ready to proceed.
-
Open the template guide and save it as your own file on your computer (we recommend doing this in the CSV format.)
-
Edit all the pre-made columns for your team members and save those changes.
-
📝 Please note the following information about this part of the process:
-
You must keep the column titles/headers exactly the same as they are listed on the template.
-
The name, email, permission, and title cells must be filled in. The other sections are optional to complete and can be left blank.
-
Be sure that there is only one space between words in your upload.
(For example: if you are adding Han Solo to your team, ensure there is only one space between "Han" and "Solo" — a quick way to check this formatting is by pressing [Command + f] on a Mac or [Control + f] on a PC to search for double spaces throughout your document.) -
If you'd like to add a person to multiple group types, use a [comma + space] in between those listed group types (as shown by the example entries on the CSV template.)
👉 Be certain you have created and added all the groups desired to your Trainual account prior to listing them in your CSV. -
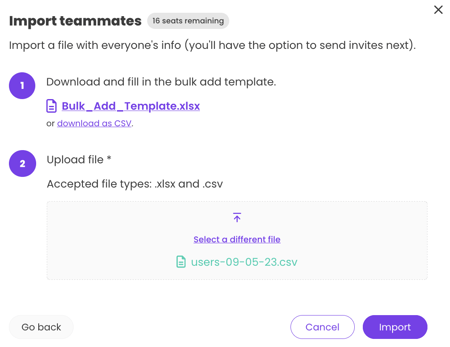
The "Import teammates" pop-up window will list how many invites you have remaining for your plan. Remember, you can only invite the number of team members you have room for still on your account. If you need to, you can upgrade your plan to add more seats or archive outdated profiles to make room for new trainees.
-
-
-
When you're done editing your CSV, drag and drop it into the "Import teammates" pop-up window to upload your document from your computer.
-
Click "Import" to proceed.
-
If the import was successful, you will be redirected to the page below.
You can then choose to "Add and invite" those employees right now or send out onboarding emails at a later time by using the "Just add" button — either option will allow you to finalize this process. 🎉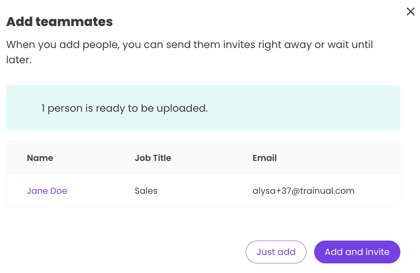
-
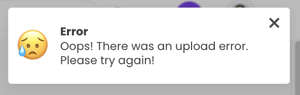
If the import was unsuccessful, you will get the error message seen below and will need to refer back to the previous steps outlined in this help document to identify the discrepancies.
-
📨 Have additional questions?
Contact Trainual support or check out more of our Trainual help resources.
🌻 SEOs: Mass Invite, Mass Add, Mass Import, Mass Upload, Mass HRIS, All Invite, All Team, All Add, Invite Error, HRIS Invite, HRIS Add, HRIS Error, Human Resources Information System