Delegation Planner™
Learn how to use the Delegation Planner™ to brainstorm any major project, goal, or milestone.
The Delegation Planner™ is your visual aid for managing shifting responsibilities as your team grows and changes. It helps you identify where employees should prioritize their time for the most effective assignment of responsibilities.

👉 Before you start:
-
This feature is only available when purchased as a part of the Trainual+ bundle. 🔗 Learn how to power up your playbook with Trainual+.
-
Only those with an Admin+ permission level can create, manage, and see delegation boards.
🗂️ Table of contents: Skip around to just the parts you need with these links.
-
❓FAQs.
Overview — What is a Delegation Planner™?
The Delegation Planner™ acts as your brainstorming page to document responsibilities, clearly define them, and signify who they belong to.
💭 These projects could look like...
- Outlining the scaling of an existing team.
- Capturing cross-collaborative work.
- Re-delegating job duties after a teammate leaves or gets a promotion.
- Proposing and presenting an idea for a new company strategy.
Part 1: Basic setup and drafting
Identify the "why" behind your board:
Begin by mapping out the key objective(s) for your delegation board. 🔑 Will this planner be used for proposing a brand new idea to leadership, reassigning job duties, or something else? Honing in on the why will help to set the stage!
-
Click "Delegation" from the left-hand navigation.
-
Hit the "Start planning" button to create your first board.
-
Type the name of the board (AKA — the main planning focus) you'd like to create in the textbox from the pop-up window and push the "Save" button.
📝 Please note: Your boards are originally created in a draft state. Publishing a board is outlined in part two of this guide.
Identify the "who" of your board:
Identify the people and groups to be involved in the responsibilities of your plan. 🗺️
-
Add people or groups to your delegation board by clicking on the "+" symbol in the right-hand corner of the drafted board page and choose which type to add: a "Group" or a "Person" from the drop-down menu.
-
Select the groups or people from the pop-up window and hit "Add."
-
Repeat steps 1 and 2 as many times as needed to include all the people and groups involved with your goal or project.
Add primary responsibilities to your groups and people:
Time to brain dump! 🧠 When you think about the success of your end goal, team initiative, or project, what responsibilities are being handled, and by whom?
-
Identify a person or group that needs an added responsibility.
-
Click the "Add responsibility" button at the bottom of their column.
-
Enter an overview of that responsibility into the populated textbox.
-
Add this responsibility by hitting the "Create" button.
📝 Please note: Adding time commitments is outlined in part two of this guide.
Set your responsibility rating terminology:
What factors influence your delegatory decisions? Maybe it’s how passionate and skilled an employee is when it comes to that responsibility.
Decide the factors that are most important to you (that you could rate a person on a scale of 1-5). These are your responsibility rating terms — you can create up to 10!
Part 2: Advanced setup and publishing
Add time commitment estimates to responsibilities:
Now it’s time to figure out: How long does each responsibility take (and how do they add up for the people in charge)?. ⏰
-
Identify the person or group needing a new time commitment.
-
Click on the listed responsibility to edit it.
-
Locate the "Time commitment" section in the pop-up window.
-
Click on the arrow next to the white textbox and choose how you'd like to quantify the time commitment: hours per day, week, month, quarter, or year.
-
Enter a numerical amount into the white textbox.
-
Apply the estimated time commitment by hitting "Save changes."
Create responsibility descriptions:
Communicate responsibility-specific expectations to your teammates here. 📋
-
Identify a person or group that holds a responsibility that needs a description.
-
Click on the listed responsibility to edit it.
-
Locate the "Responsibility description" section in the pop-up window.
-
Start writing in the provided textbox and detail the expectations of this specific responsibility in one or two sentences.
-
Apply the description by hitting "Save changes."
Link relevant content to responsibilities:
Connect helpful how-to content to each responsibility so the people in charge know exactly how to get it done (the right way.) 📚
- Identify a person or group that holds a responsibility that needs linked content.
- Click on the listed responsibility to edit it.
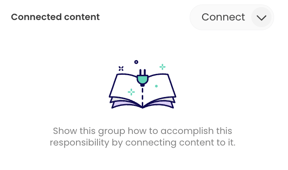
- Locate the "Connected content" section in the pop-up window.
- Hit the "Connect" button.

- Search for the subject, topic, or step that needs to be linked.
- Apply the content by hitting "Connect content" and then "Save changes" at the bottom of the pop-up window.
🔥 Tip: Connect different types of links by clicking on the arrow next to the "Connect" button. This will allow you to add an external URL or even link a newly created subject.

Set ratings for individual responsibilities:
How would you rate this person on a scale of 1-5 using the responsibility rating terms you created prior? 👀
-
Identify a responsibility that needs ratings.
-
Click on the listed responsibility to edit it.
-
Locate the rating section in the pop-up window.
-
Select all terms that apply by clicking on the checkbox to the right and use the sliding scale to pick a number between 1-5 to set an importance rating.
-
Apply the terms and ratings by hitting "Save changes."
Publish your delegation board:
You've done it! Your plan has been outlined, documented, and given all the details it needs to be a successful first go around. Time to publish. 🚀
-
Publish your delegation board by clicking the "Apply to account" button in the upper right-hand corner of your planning page.
-
Review the confirmation pop-up and decide your next action: "I'm done for now!" or "Create another board."
📝 Please note: Only Admin+ permission levels will see the fully published board under the Delegation Planner™ page, but the teammates involved in each plan will now see their new responsibilities listed under their profile pages.
Managing your existing delegation boards:
Employees get promoted, projects are finalized just to be replaced by the next big idea... nothing in business really stays stagnant for too long. Your Delegation Planner™ boards can continue to help you plan out any company goal or change — no matter the size! 🏔️
Make edits to an existing board:
Projects, goals, and plans ebb and flow. Use these steps to make an update! ✍️
-
Click "Delegation" from the left-hand navigation.
-
Select a board to edit by opening the board drop-down menu.
-
Make the edits you desire.
-
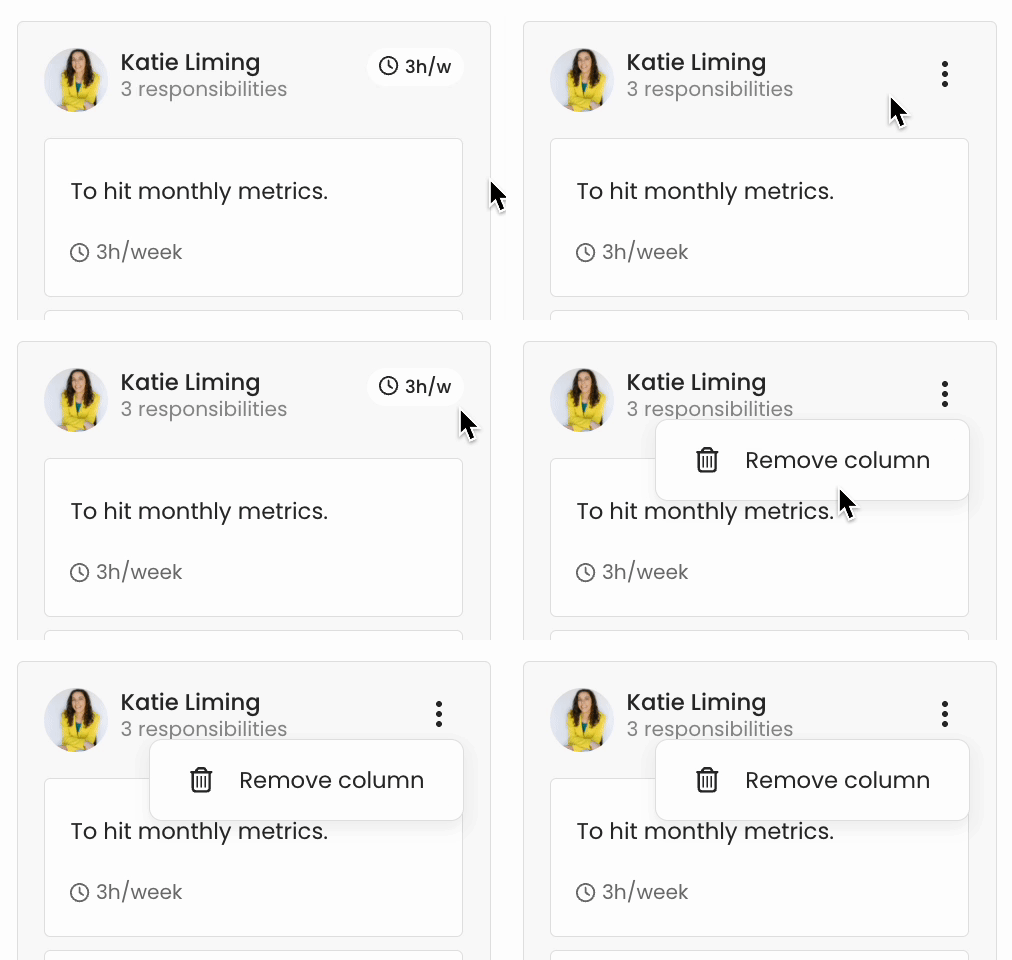
Remove a column:
-
Edit a responsibility:
-
Click on a listed responsibility textbox under any person or group.
-
From the pop-up window, make changes to the time commitment, responsibility description, connected content, or responsibility ratings.
-
Hit the "Save changes" button to apply the update.
-
-
Edit the board name:
-
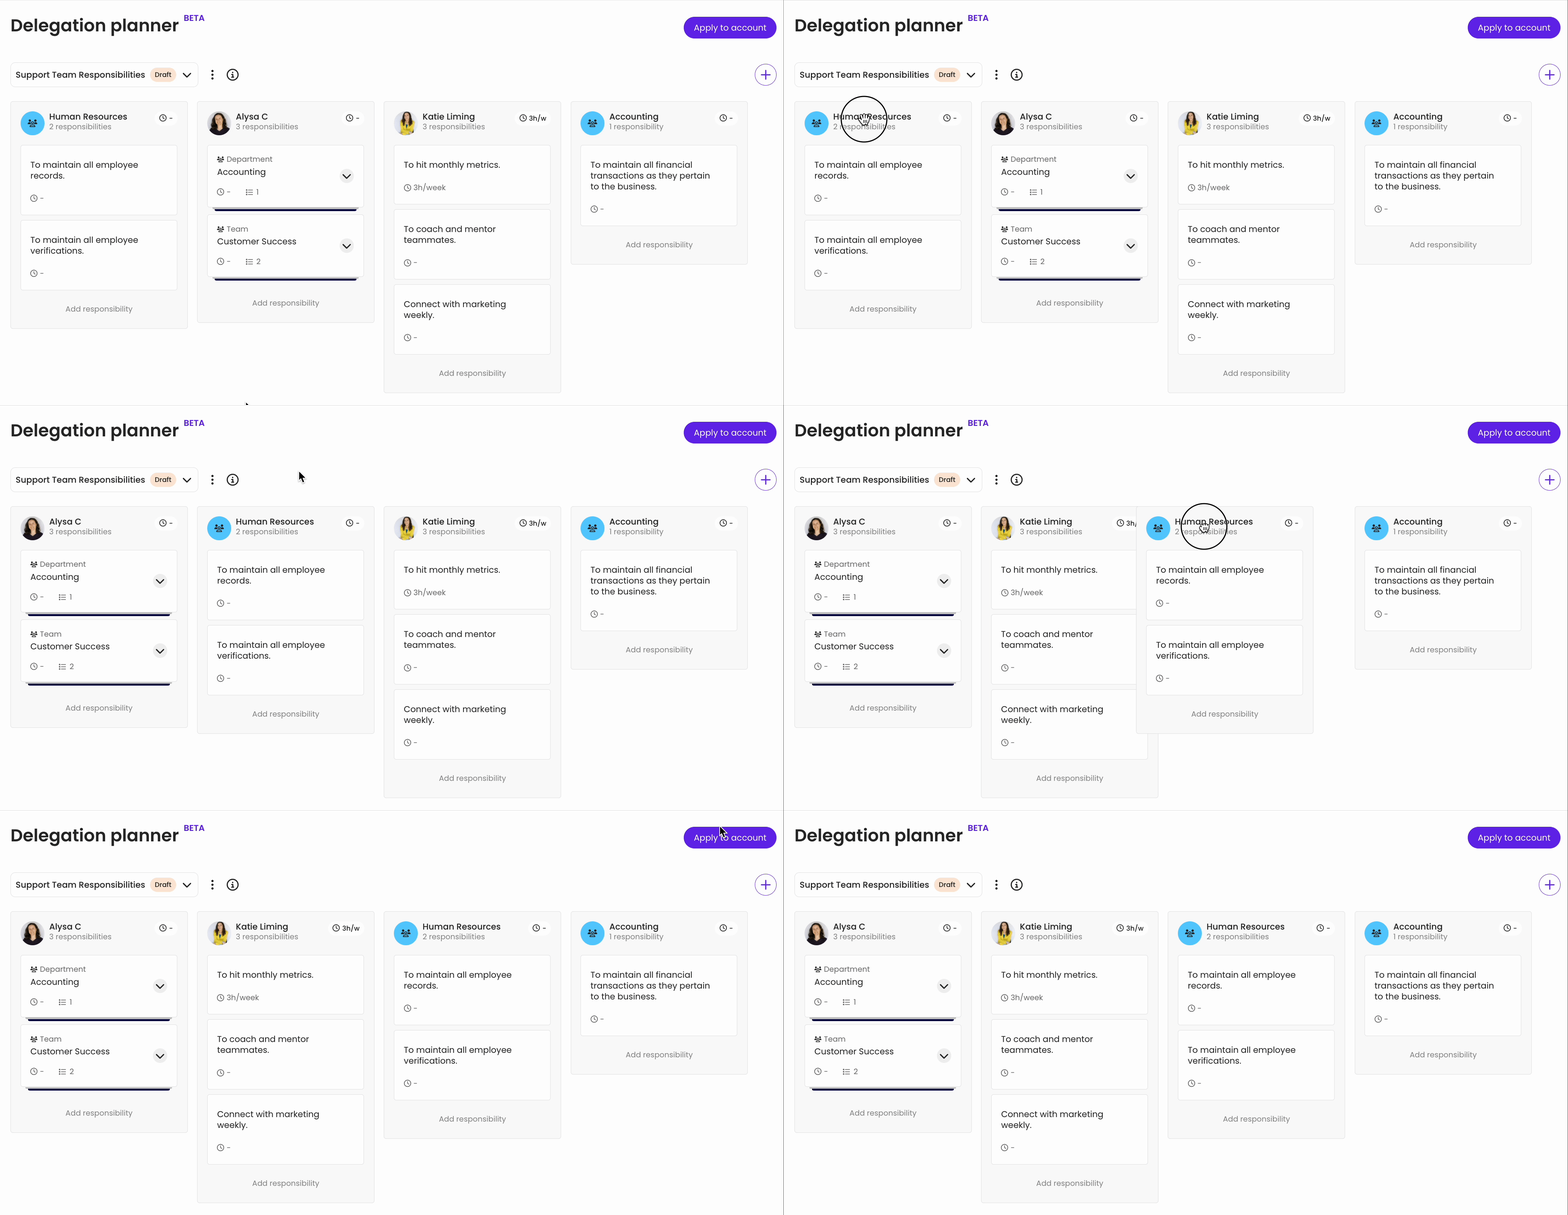
Drag and drop columns to reorder people and groups:
Keep your key players front and center by changing your column display order. 🧮
-
Hover over the name of the person or group you'd like to move.
-
Click and hold your finger down on your mouse.
-
Drag and drop the column to where you'd like to place it on the board.
-
Publish your changes to your delegation board by clicking the "Apply to account" button in the upper right-hand corner of your planning page.
Drag and drop responsibilities to reassign:
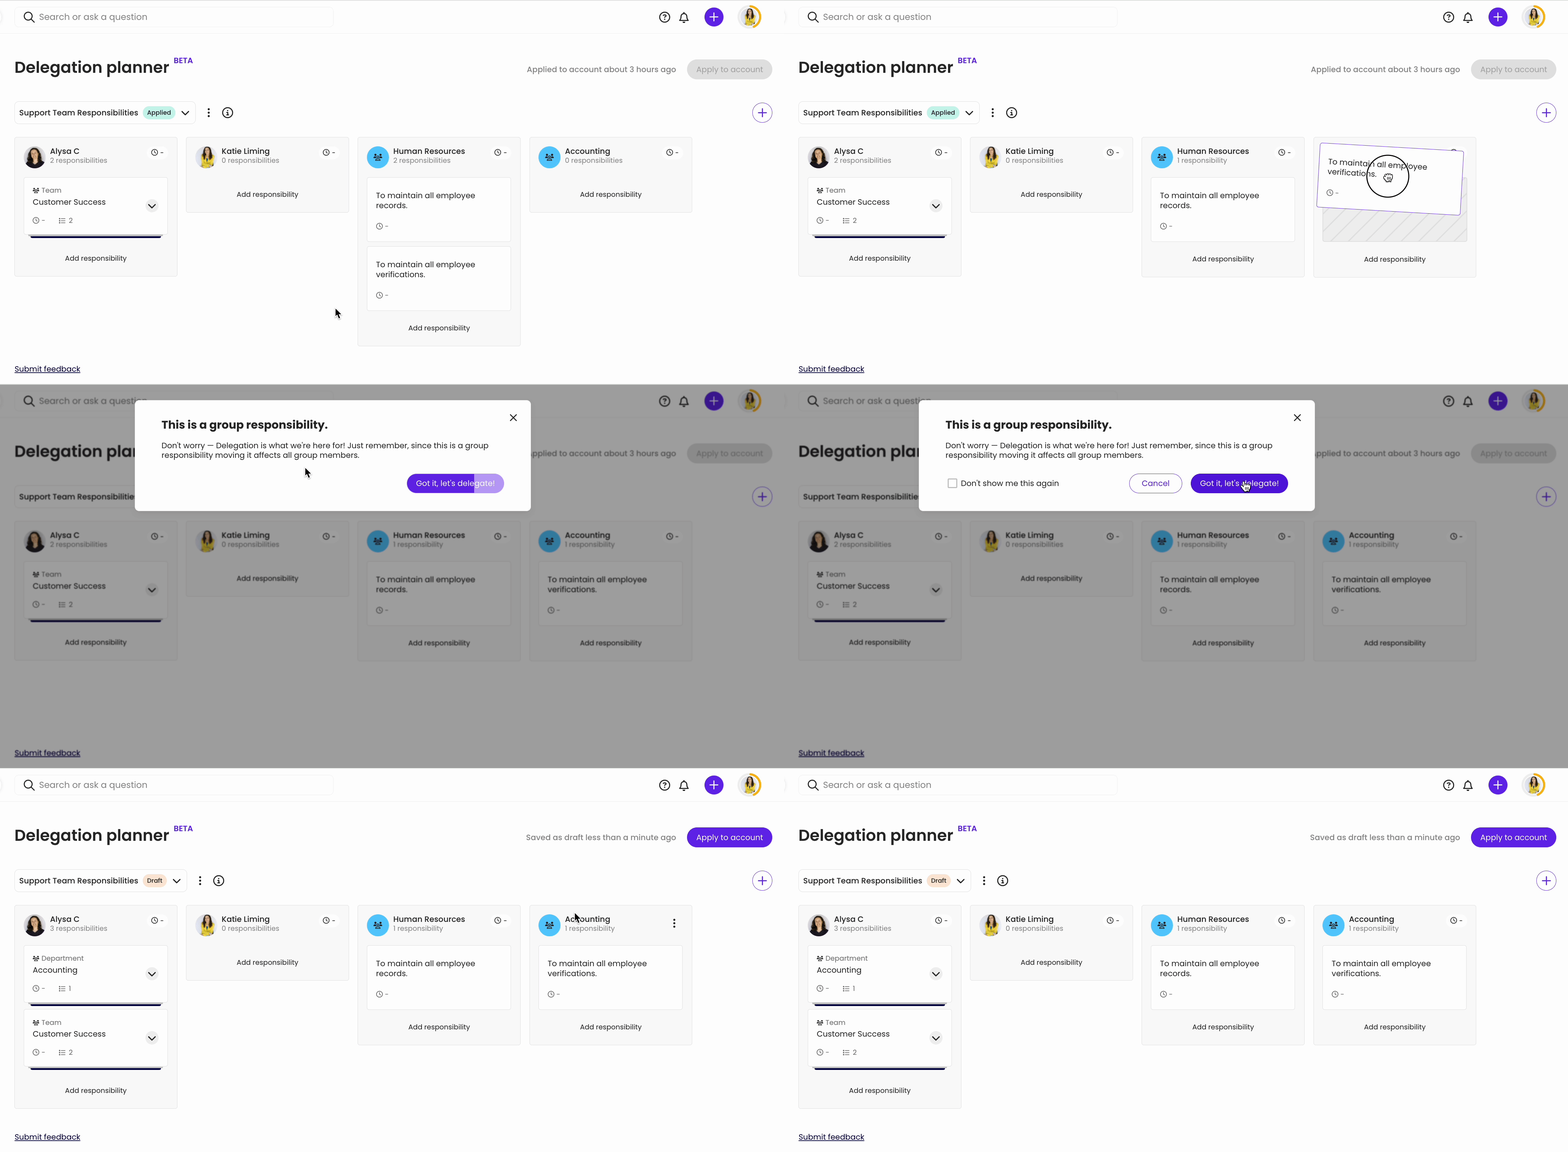
Does a responsibility make more sense to delegate to a different person or group? Change the listing by dragging and dropping it into a different column.
-
Hover over the responsibility textbox of the person or group you'd like to move.
-
Click and hold your finger down on your mouse.
-
Drag and drop the responsibility to the column you'd like to place it under on the board.
-
(If this is a group responsibility) Review the pop-up window information on the action you are taking and confirm the move of your responsibility by clicking the "Got it, let's delegate!" button.
-
Publish your changes to your delegation board by clicking the "Apply to account" button in the upper right-hand corner of your planning page.
Create another board:
Ready for your next planning session? Use the steps listed below to get started! 🎉
Remove an existing board:
Have you reached your goal? Is the project complete? Time to clean up! 🧹
-
Click the three dots next to the board drop-down menu.
-
Select "Remove board" from the populated choices.
-
Review the pop-up window information on the action you are taking.
-
Confirm the removal of your board by clicking the "Remove" button.
📝 Please note: This action cannot be undone, and the board cannot be recovered after it has been deleted.
Remove an existing responsibility:
Is a listed responsibility no longer relevant? Remove it using these steps. 🗑️
-
Click on a listed responsibility textbox under any person or group.
-
Locate the "Options" section in the pop-up window.
-
Hit the "Remove responsibility" button.
-
Publish your changes to your delegation board by clicking the "Apply to account" button in the upper right-hand corner of your planning page.
📝 Please note: This action removes a responsibility platform-wide once the changes have been published and is not just an update under the delegation board.
FAQs
I added my groups and people but saw responsibilities load that I did not create. Where did those come from?
The Delegation Planner™ will always pull from and display any pre-existing responsibilities that already existed for your teammates and groups. Any responsibilities created outside the Delegation Planner™ (ex. in group overviews or people profiles) will sync with the delegaiton board and appear as added columns.
How do I recover the previous version history of my delegation boards?
You are unable to access previous versions of Delegation Planner™ boards at this time. Please do not save changes to a board without making notes of what was adjusted if this historical information is needed.
How can I submit my feedback and ideas about features?
If you'd like to share your thoughts about the Delegation Planner™ or think of something else you'd like to see added in the future, send us your feature requests and ideas.
Can the responsibility rating terminology be reset after it has been modified?
No. If you need to change these back to the original feature terms, please manually enter them into "Delegation planner" account settings using the reference below:
- Green = Skill
- Blue = Passion
-
Yellow = Business impact
-
Pink = Career alignment
Learn more about Trainual team planning features:
-
Display reporting relationships and chains of command with an org chart.
-
Map out your current and future reporting structures by creating a role chart.
-
Delegate group member and content management to your trusted employees.


